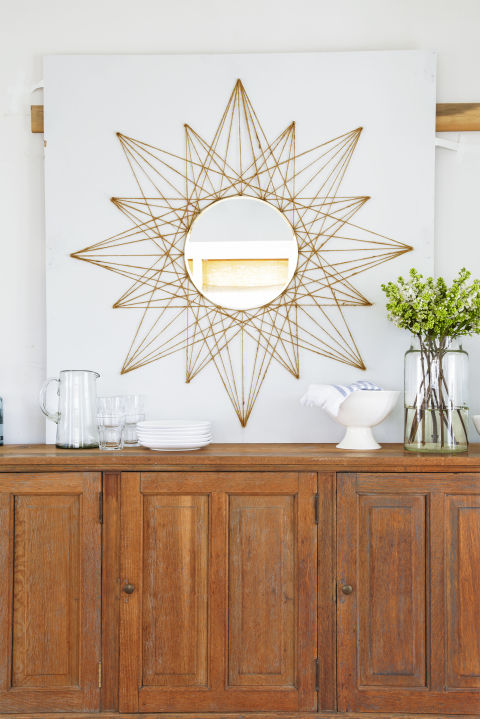
Grab some rope and get to work!
Adding a DIY project into the mix can give your store-bought decor new life and dress up your home on a budget. Follow these quick and easy steps courtesy of CountryLiving.com to learn how to make a stunning star mirror that look expensive, but costs less than $25.
What you'll need:
•1 spool of jute twine ($5, amazon.com)
• 14 inch round mirror ($8, michaels.com)
• Painter's tape ($4, amazon.com)
• Nails ($7, amazon.com)
Step 1: Trace and Number
Trace the circumference of the mirror in pencil on the wall where you want it to hang, then mark the center. Divide the circle into 16 equal sections, marking a point where each line meets the circle. Mark off each point with numbered pieces of painter's tape (numbered 1-16), starting with 1 at the top center and continuing in numerical order, moving in a clockwise direction.
Step 2: Tape and Nail
At point 1, measure a 16-inch vertical line outward, using a yardstick for guidance, and mark the end with a point. Move to point 2, measure a 12-inch line, and mark the end. Continue for each circle point, alternating between 16 and 12 inches. Mark outer points with numbered pieces of painter's tape (numbered 17-32), with 17 at the top center and then continuing in numerical order, moving in a clockwise direction. Hammer nails into all points.
Step 3: Wrap Twine
Using the following guide, wrap the twine around the nails, beginning with a knot at the starting nail and ending with a knot and cutting the twine at the last nail. Start at nail 25, wrap around nails 11, 29, 15, 17, 3, 21, and 7, ending at 25. Start at nail 26, wrap the twine around nails 12, 30, 16, 18, 4, 22, and 8, ending at 26. Start at nail 27, wrap the twine around nails 13, 31, 1, 19, 5, 23, and 9, ending at 27. Start at nail 28, wrap the twine around nails 14, 32, 2, 20, 6, 24, 10, ending at 28.
Step 4: Wrap Twine (Again)
Next, start at nail 25 and wrap the twine around nails 9, 26, 10, 27, and 11. Continue this pattern, alternating between the inner and outer nails in a clockwise direction, until you make it back to 25. Without cutting the twine, skip nail 9 and wrap it around nails 10, 26, 11, and 27, continuing the same alternating pattern until you make it back to nail 10. Finally, moving clockwise, wrap the twine around each inner nail in a clockwise direction until the circle is complete at nail 9.
Step 5: Hang Mirror
Apply two large picture hanging strips on the back of the mirror and adhere the mirror to the wall following package instructions.
Styling by Carla Gonzalez-Hart; Crafting by Andrea Greco
This article was originally published in the February 2018 issue of Good Housekeeping.


