When she was growing up, Marie Newswanger says, the question at birthdays was never, “What kind of cake would you like?”
Instead, “It was always, ‘What kind of pie would you like?’ ”
Growing up Amish on a Lancaster County dairy farm, Newswanger doesn’t really remember a time when she wasn’t helping to bake pies — or at least helping to eat the “roly-polies” made from scraps of extra pie crust dough, cinnamon, sugar and maybe crushed pecans or walnuts.
She’s upholding that pie-making tradition, not as a professional but as a dedicated pie-baker at home.
There have been some changes. Newswanger isn’t making massive batches of pies for Sunday after-church meals, and she turns to social media, especially photo-based Instagram, for inspiration.
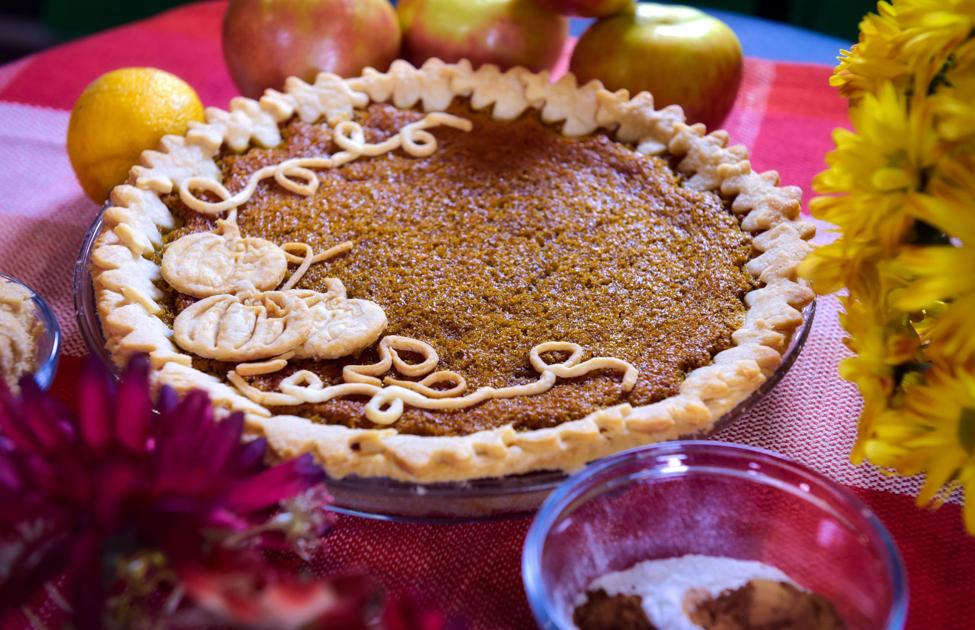
And the results, often with meticulously decorated pie-crust tops, are lovely.
Here’s how she does it — and how you can, too.
Adapting and expanding
One of Newswanger’s first adaptations was to the crust recipe itself. Her mother’s initial recipe, she says, “made a huge, huge batch” of crusts. “So it was, like, 20 cups of flour .... you know, and then you add whatever else.”
Newswanger prefers mixing a batch of the dry ingredients, then refrigerating the mixture. Then, as she decides to bake a pie, she can just “grab a handful” and add milk .
“I find it to be easier,” she says. “It can last in the fridge for a couple months until you need it.”
And it results in a flakier, pastrylike crust — just as her family prefers.
The decorative top crusts are a relatively recent development.
“I probably started getting fancier a couple years ago,” she says. “It was actually Instagram that got me into it. ... I thought my pies were original until I started to (see others). You can see all the artsy ideas, and everyone’s so creative, so it got me to thinking, ‘Huh ... this could be fun!'"
The other reason? An appreciative mother-in-law.
Her husband’s mother “loves, loves, loves pie crust — especially my crust, she says, but she might be biased a little bit!” Still, Newswanger started making more decorative pie crusts as a way to add a little more crust to the pie. “Like, the braid around the edge or something, or cut out wreaths and put them along the side,” Newswanger says.
She gets many of her pie-decorating ideas from the outdoors. “I love being outside, and I love nature,” she says, “so I feel like I usually try to incorporate that somehow.”
She’ll also glean inspiration from holiday events. Last year, a Christmas pie sported a completely plain crust, but Newswanger then used cookie cutters to create a Santa Claus and sleigh, painted them with food coloring and sent them “flying” across the top of the pie.
Try it out
So if you’re a novice pie-maker (or a longtime pie lover whose crusts don’t always satisfy) who’s feeling ready to tackle a from-scratch technique, check out Newswanger’s recipes below.
And remember: If all else fails, leftover pie crust makes excellent roly-polies.
BASIC PIE CRUSTS
Ingredients:
- 8 cups flour
- 2 teaspoons salt
- 2 teaspoons baking powder
- 1/4 cup 10X (confectioners’) sugar
- 2 1/2 cups Crisco
Directions:
Mix all ingredients together until it forms a crumblike consistency. Store this pie crust base in the refrigerator in an airtight container for up to two months.
When making a pie crust, use around 3 cups of the crumb base and mix with 3 tablespoons cold milk. Make sure not to overwork the pastry crust. If it’s too sticky, add more flour; too dry, add more milk.
Makes one pie.
Ingredients:
- 3 cups snitz (dried apples)
- 2 1/2 cups warm water
- 1 teaspoon lemon
- 2/3 cup brown sugar
- 1 teaspoon cinnamon
- 1 teaspoon vanilla
Directions:
Mix water with the snitz, then cook over low heat until the dried apples are soft and all the water is soaked up. Mix the rest of the ingredients with the soaked snitz and mash or pulse in a food processor until it becomes a chunky consistency.
Pour into pie shell. Top with pie crust and vent.
Bake at 425 F for 15 minutes.
Reduce heat to 350 F and bake for another 30 minutes.
PUMPKIN CUSTARD PIE
Makes one 10-inch pie.
Ingredients:
- 1 cup pumpkin puree
- 1/2 cup granulated sugar
- 1/2 cup brown sugar
- teaspoon flour
- 1 teaspoon vanilla
- 2 teaspoons molasses
- 1 teaspoon cinnamon
- Powdered cloves and nutmeg to taste
- 4 eggs (separated)
Directions:
Mix everything together except egg whites. In a separate bowl, beat egg whites until frothy and fold into pumpkin mixture.
Pour into pie shell, add top crust and vent.
Bake at 400 F for 10 minutes.
Reduce heat to 350 F and bake for another 35 minutes.
Makes one pie.
Ingredients:
- 6 cups apples, cored, peeled and sliced
- 2 teaspoons lemon juice
- 4 tablespoons flour
- 1 cup brown sugar
- 1 teaspoon cinnamon
- 1/4 teaspoon ground glove (optional)
- 2 tablespoons melted butter
- 1/4 teaspoon vanilla extract
Directions:
Drizzle lemon juice over apples and stir, then add the rest of ingredients and keep gently stirring till all ingredients are well incorporated. Pour into bottom pie crust, top with crust and vent.
Bake at 425 F for 45 minutes.
ROLY-POLY TREATS
There probably are as many ways to make these leftover pie-dough treats as there are families who make them. This is just one technique:
Ingredients:
- leftover pastry dough
- butter, room temperature
- brown sugar (or regular sugar can be substituted)
- cinnamon
- optional: finely chopped walnuts (almonds, hazelnuts, pistachios or pecans will also do)
Instructions:
Line a baking sheet with parchment.
Gather up all the rag-tag scraps of dough leftover from making your pie or tarts. Form them into a ball, and on a lightly floured surface roll the dough into a long thin strip about 4 to 6 inches wide. Roll it as thinly as you can without breaking the dough.
Butter the pastry down its length. You want to spread the butter down the center leaving a good inch on either side. Don’t skimp. Pretend it’s peanut butter. Yes, you want it that thick.
Sprinkling by hand, cover the butter with a layer of brown sugar. Gently sprinkle the sugar with ground cinnamon, then top with the finely ground nuts.
Fold the unbuttered lengths toward the middle. They should overlap and cover the filling. If your dough is long enough, shape it into a circle by tucking one end into the other. If your dough isn’t long enough to bend, simply pinch the ends to seal them. If your pie was coated with a wash, you can coat the roly-poly too, but it’s equally fine to bake the pastry as is.
Place the roly-poly onto the prepared baking sheet and pop it into the oven beside your pie. Don’t worry about the oven temperature. If it’s hot enough to bake your pie, it’s hot enough for the roly-poly. Bake until the roly-poly is golden brown and any brown sugar that escaped is all melted and bubbly. This usually takes 20 minutes, but the timing will vary with oven temperature.
Place the roly-poly pan on a wire rack to cool. If the pie needs to continue baking, leave it in the oven. Just shut the door quickly. Allow the roly-poly to cool slightly. Cut it into pieces and eat while still warm. Or let it cool. It really doesn’t matter.
